10 Tips for Drying Food Safely for Global Buyers

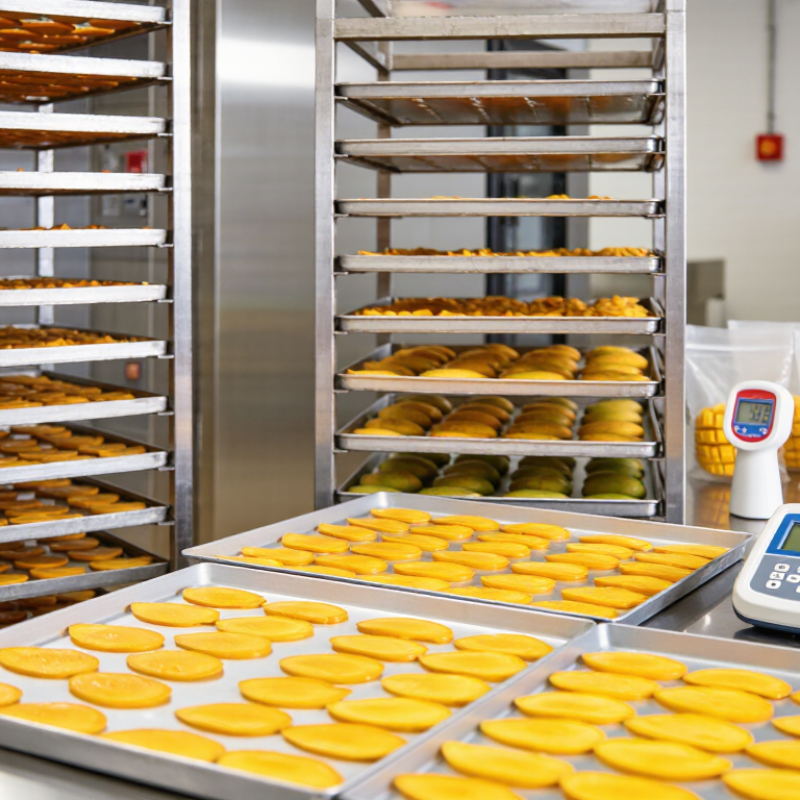
For global buyers, safely dried food is more than a product with reduced weight. It is a controlled process that protects flavor, texture, shelf life, and consumer trust. During drying food, small details matter: clean trays, even slices, steady airflow, and verified temperature. A few thick mango pieces can stay damp inside while their surfaces look finished. That hidden moisture may encourage mold, spoilage, or inconsistent quality during shipping. This guide presents ten practical tips for preparing dried foods with care. It focuses on hygiene, moisture control, equipment checks, packaging, labeling, and traceable records. These steps support informed purchasing decisions across different markets.

Reliable drying starts before the machine is switched on. Raw materials should be sound, clean, and handled away from contamination risks. Operators need suitable thermometers, clean surfaces, and documented batch conditions. Testing water activity can provide stronger evidence than appearance alone. Packaging should resist moisture, protect against light when necessary, and remain sealed through transport. Importers must also confirm destination-country requirements with competent authorities and qualified food-safety professionals. Rules can differ by product and market. No process is flawless. A missed reading or rushed cooling step can weaken an otherwise careful batch. That is why honest records, verification, and corrective action matter. These habits build confidence between producers, suppliers, and buyers worldwide.
10 Tips for Drying Food Safely for Global Buyers

Selecting Suitable Foods and Preparing Them for Drying

Selecting food for drying is a quality decision, not merely a preservation step. Choose ripe, sound produce without bruises, mold, insects, or fermentation odors. High-moisture fruits usually dry more evenly when sliced thinly. Lean meat needs stricter controls and validated heating. The FAO State of Food and Agriculture 2019 report estimates that 14% of food is lost between harvest and retail. Careful preparation can reduce avoidable loss, but drying cannot rescue spoiled food. Never gamble with defects.

Tip 1: Match the food to the method. Blanch vegetables briefly to slow enzyme activity and preserve color. Pretreat sliced fruit with a suitable food-grade acid solution to reduce browning. This is not sterilization. Use potable water, clean knives, and sanitized trays. Keep pieces similar in size, preferably around 3–6 millimeters, so moisture leaves evenly. Uneven slices create hidden risks.

Tip 2: Control heat, airflow, and final moisture. For meat products, apply validated heating procedures; food-safety guidance commonly specifies 71°C for meat and 74°C for poultry before or during drying. For other foods, follow tested process limits.

Tip 3: Verify dryness with texture and, when possible, a calibrated water-activity meter. Many shelf-stable dried foods target water activity below 0.60, but each product requires validation. Cool completely before packing in moisture- and oxygen-barrier materials. WHO estimates 600 million foodborne illness cases annually, so small process shortcuts deserve serious review.

Choosing Safe Drying Methods for Different Food Types

10 Tips for Drying Food Safely for Global Buyers

Choosing Safe Drying Methods for Different Food Types

Fruit needs gentle, even airflow. Slice apples or mangoes to similar thickness. Use clean trays and a controlled drying chamber. Monitor temperature with a calibrated thermometer. Finished pieces should feel flexible, not wet inside. Check water activity when possible. Color alone proves little. Keep samples.

Leafy herbs dry quickly at low heat. Excess heat can damage aroma and darken the leaves. Vegetables usually need blanching before drying. This step reduces enzyme activity and may improve color. Thin carrot slices should dry separately from thick pumpkin pieces. Mixed loads often dry unevenly. That mistake is easy to make.

Meat and seafood require stricter control. Follow validated time-temperature procedures and approved pre-treatment methods. Prevent cross-contamination throughout handling. Drying cannot reliably correct unsafe raw materials. Cool products in a clean area before packing. Test representative batches for moisture, water activity, and microbial safety. Keep records of lot numbers and drying conditions for buyers. Requirements differ by destination, so confirm current import and labeling rules. No method is perfect. A small trial batch may reveal uneven texture, hidden moisture, or a weak seal before shipment. That extra check can prevent a costly failure.

10 Tips for Drying Food Safely for Global Buyers

Choosing safe drying methods for different food types

How to read the chart: The bars show common dehydrator temperature ranges for major food categories. Use a calibrated appliance, cut food into uniform pieces, avoid overloading trays, and confirm that the final product is fully dry before packaging.

Critical safety point: For jerky, heat meat to at least 71°C (160°F) and poultry to at least 74°C (165°F) before or during dehydration, following applicable local food-safety requirements. Store dried foods in clean, airtight packaging and check for condensation after cooling.

Reference basis: USDA Food Safety and Inspection Service and the U.S. National Center for Home Food Preservation. Temperature ranges are practical reference values, not a substitute for validated commercial processing controls.

Controlling Temperature, Airflow, and Drying Time

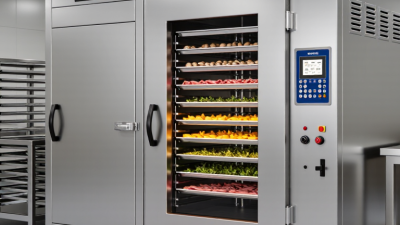
Safe food drying starts with measurement, not guesswork. Use a calibrated thermometer to verify chamber temperature at several points. Many fruits dry well around 55–60°C, while meat requires a validated process that controls pathogens before drying. Follow current food-safety guidance for the product and destination market. Thin, even slices dry more consistently. Keep pieces apart. Crowding traps moisture and creates soft centers where spoilage can begin. Small batches are easier to inspect, even when production targets are demanding.

Airflow must pass across every tray, not merely heat the front of the cabinet. Check for cold corners with temperature and humidity readings. Rotate trays only when testing shows uneven drying; unnecessary opening wastes heat and extends the process. A gentle, steady airflow protects delicate herbs, but denser foods may need stronger circulation. Watch the surface. A dry skin can form while the center remains wet. That is a common failure.

Drying time depends on slice thickness, sugar content, humidity, and load size. Record start time, temperature, airflow setting, and final moisture or water activity when available. Do not rely on touch alone. I have seen pieces feel dry after cooling, then release moisture inside sealed packaging. Let samples cool before checking texture, and test several pieces from different trays. If results vary, lower the load or extend drying gradually.

Preventing Contamination During Handling and Storage

Drying food safely starts before the trays enter the dryer. Workers should wash and dry their hands, wear clean protective clothing, and sanitize knives, tables, and containers. Keep raw ingredients away from dried products. A small splash from an unclean sink can spread contamination across an entire batch.

Use a validated drying schedule for each product and measure temperature with a calibrated instrument. A batch may look dry while still holding enough moisture for mold growth. Checking water activity gives stronger evidence than appearance alone. I once trusted a crisp surface too quickly; the center was still soft. That mistake deserves attention. Cool food in a clean, protected area before packing. Warm food can create condensation inside sealed packaging.

Use food-grade, intact packaging and label every batch with the production date and handling details. Store cartons on clean pallets, away from walls, sunlight, pests, and chemicals. Control humidity and temperature, then inspect storage areas regularly. Look for torn seals, damp cartons, unusual odors, or insect activity. Keep a traceable record of cleaning, drying results, packaging, and shipment conditions. Global buyers need consistent evidence, not verbal assurance. Written procedures should match actual practice, although teams sometimes skip a step during busy periods. Refresher training and independent checks can expose those weak points. Destination requirements may differ, so exporters should confirm applicable food safety and labeling rules before shipment.

Checking Quality, Packaging, and Export Readiness

Drying food safely for global buyers requires more than a crisp texture. Check moisture content with a calibrated meter, then verify water activity when the product supports microbial growth. Inspect color, odor, texture, and visible defects under consistent lighting. Keep representative samples from every production lot. They provide evidence.

Record drying temperature, time, equipment settings, and operator checks. A reliable quality file should also include laboratory results, allergen information, ingredient details, and traceability codes. Do not guess shelf life. Use stability data, conservative calculations, and documented storage conditions. Small errors become expensive overseas. Review them honestly.

Packaging must protect the food from moisture, oxygen, light, insects, and crushing. Use food-contact materials supported by supplier declarations and test the seal strength. Add a clear lot code, production date, best-before date, net weight, storage advice, and handling marks. Confirm label language and destination-market requirements before printing. Export readiness also includes a commercial invoice, packing list, certificate documents, and transport conditions agreed with the buyer. Check pallet stability and container cleanliness. One missed carton count can delay clearance. A final pre-shipment inspection is wise, although it cannot replace process control. Reflect after every shipment. What nearly failed? That answer often improves the next batch.